Live 360! Two-Day HOL Pre-workshop Config


Sunday & Monday, November 17 & 18, 2019, will find myself and my buddy Phil Japikse in sunny Orlando, FL, delivering a two-day hands-on lab Building Modern ASP.NET Core Web Apps the Right Way with Azure DevOps in Two Days. You can find all details here.
In order to do the labs, you need to BYOD—bring your own device. You will need to have the correct development tools installed. In addition, you need access to the Internet, as well as some Microsoft services (Azure and Azure DevOps in particular).
The VSLive site lists the following prerequisites (important, please continue below and look for additional information):
You must provide your own laptop computer (Windows or Mac) for this hands-on lab. Experience with C# coding and basic SQL Server knowledge required.
Each attendee will need the following, ready to go, for the hands-on workshop:
- A Windows or Mac computer with Wi-Fi where you have local administrator rights
- A modern development environment like Visual Studio 2019 or Visual Studio Code. Specific versions and details will be provided before the workshop.
- Docker Community Edition
- A valid, active Azure subscription where you, the attendee, are an administrator
- A Microsoft Account (aka a Live ID/Xbox ID)
Here's effectively Lab 0 :)
Prior to starting the the workshop, you must have .NET Core 3.0+ SDK, .NET Core 3.0+ runtime, Docker Community (or a local installation of SQL Server), and an appropriate IDE installed.
Supported IDEs include:
- Visual Studio 2019 16.3+
- Visual Studio Code 1.38.1+
SQL Server Management Studio is also recommended when developing on Windows.
Part 0: Permissions
You must have admin permissions on your machine to complete this hands-on lab.
Part 1: Installing the Prerequisites
Doing this before the first day of the workshop saves you time and suffering.
Step 1: Install and Confirm .NET Core Runtime and SDK
1) Download and install the latest 3.0 .NET Core SDK and Runtime from https://dot.net.
- For Visual Studio 2019 Windows (16.3.X) Mac (8.0) download SDK 3.0.100
- For Visual Studio Code (or any other IDE) download SDK 3.0.100
2) Open a command window and type:
where dotnet
After unpacking some files, it should respond with:
C:\Program Files\dotnet\dotnet.exe
You might also see the following (not required for this course):
C:\Program Files (x86)\dotnet\dotnet.exe
3) Check the version of the .NET Core Runtime by entering:
dotnet --list-runtimes
The response will be (at the time of this writing):
Microsoft.AspNetCore.App 3.0.0 [C:\Program Files\dotnet\shared\Microsoft.AspNetCore.App]
Microsoft.NETCore.App 3.0.0 [C:\Program Files\dotnet\shared\Microsoft.NETCore.App]
Microsoft.AspNetCore.App leverages the ASP.NET Core shared framework. Any assets in the ASP.NET Core shared framework will not be deployed with your app, and are pre-compiled for better application startup time. Microsoft.AspNetCore.App also uses version roll-forward to work with later versions of the 3.x framework installed on the target machine.
4) Check the version of the .NET Core SDK by entering:
dotnet –list-sdks
The response will be (at the time of this writing):
3.0.100 [C:\Program Files\dotnet\sdk]
Step 2: Install an IDE
The HOL will work with Visual Studio 2019, Visual Studio for the Mac, or Visual Studio Code.
Option 1: Download and install Visual Studio 2019 16.3+
1) Download Visual Studio 2019 16.3+ (any edition) from the Visual Studio home page: https://www.visualstudio.com/en-us/visual-studio-homepage-vs.aspx
The Community Edition is free, and has everything you need to complete this Hands-On Lab
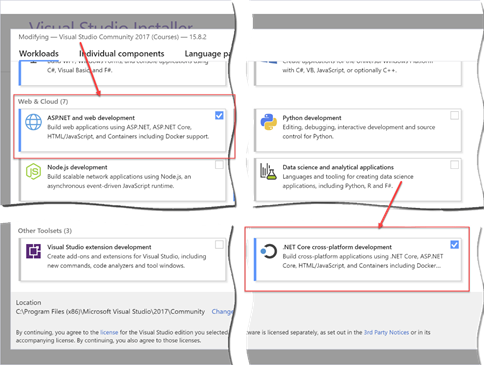
2) Start the installer
The new installation experience has separate workloads based on what type of work you intend to do. For this lab, select the ASP.NET and web development workload as well as the .NET Core cross-platform development workload.
Option 2: Download and install Visual Studio Code 1.39.2+
1) Download Visual Studio Code from https://visualstudio.microsoft.com/.
2) Install the “Microsoft C# extension (powered by OmniSharp)” extension.
Step 3: Download and install SQL Server Tooling
Windows: Download/Install SQL Server Management Studio (SSMS)
This is not required for the workshop, but makes it easier to work with the database.
1) Download and install SQL Server Management Studio 18.3.1+ from https://docs.microsoft.com/en-us/sql/ssms/download-sql-server-management-studio-ssms?view=sql-server-ver15
This is a free tool from Microsoft.
Mac: Download/Install Azure Data Studio
This is not required for the workshop, but makes it easier to work with the database.
2) Download and install Azure Data Studio 1.13.0+ from https://docs.microsoft.com/en-us/sql/azure-data-studio/download?view=sql-server-2017 . This is a free tool from Microsoft.
You can choose to do Steps 4a and 4b **OR** 5
If you can't run Docker because you can't run/install Hyper-V (or for some other reason), skip Steps 4a and 4b and go to Step 5 where you install SQL Server.
Step 4a: Install Docker Community
Docker is a containerization platform that runs on Windows, MacOS, and Linux.
1) Download and install Docker Desktop from https://www.docker.com/get-started . 2.1+ is required.
- When installing, select Linux containers (and not Windows containers)
- This is a free tool but requires you to have a Docker user id and password
2) Download and Install Kitematic for Docker by right clicking on the Docker ship in the system tray, click Kitematic, and follow the instructions. Kitematic is a GUI for managing Docker images and containers.
You might need to pull the install from https://github.com/docker/kitematic
Step 4b: Pull the SQL Server Image and Create the Local Container
A Docker image is like a class definition, while a Docker Container is like an instance of that class. To run SQL Server in Docker, you must first pull the image from Docker Hub, and then create a container using that image.
1) Pull the SQL Server 2017 for Linux (Ubuntu 16.04) image. Enter the following command:
docker pull mcr.microsoft.com/mssql/server:2017-latest
2) When creating an image, there are two required environment variables, “ACCEPT_EULA” and “SA_PASSWORD”. An optional environment variable “MSSQL_PID” sets the product version. The host port mapping to the image port needs to be set, and a friendly name added. Create the container using the following command:
a) NOTE: On Windows, use double quotes ("). On Mac and Linux, use single quotes (').
docker run -e "ACCEPT_EULA=Y" -e "SA_PASSWORD=P@ssw0rd" -e "MSSQL_PID=Express" -p 6433:1433 --name SpyStoreHol -d mcr.microsoft.com/mssql/server:2017-latest
Step 5: [Optional if you performed Steps 4a and 4b] Download and install SQL Server 2017 Developer Edition (only do this if you're NOT using Docker and you don’t already have a SQL Server instance installed)
1) Download the SQL Server 2017 Developer Edition from https://go.microsoft.com/fwlink/?linkid=853016
This should be it. :-) However, software development is dynamic.
FAQ
Do I need to be a local administrator?
Yes. In general developing without local administrator rights can be problematic. We can't guarantee you won't have issues if you're not a local Windows administrator.
What version of Windows do I need?
We'll be doing all our testing on Windows 10 1809 and 1903. Your version just needs to be compatible with Visual Studio. You can find details here and here.
What versions of Visual Studio can I use?
You can use Visual Studio 2019 (see details above) or the latest version of Visual Studio Code.
Can I use a Visual Studio Mac?
No.
Can I use Visual Studio Code?
Yes.
What's a Microsoft Account
See here for more information.
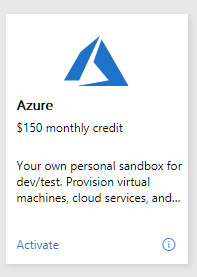
How do I get an Azure Subscription?
- If you have an Visual Studio/MSDN Subscription, activate it from here. Look for a button like the following (the actual dollar amount can vary):
- Sign up for a free trail here. There's a FAQ here regarding free accounts.
- Use your credit card and follow instructions to sign up here.
How can I verify I have an Azure Subscription?
- Go to https://portal.azure.com
- Log in.
- Click Subscriptions on the left-hand menu
- Look in the list for one or more subscriptions where My Role shows Owner and the Status is Active.


How can I verify I am an Administrator?
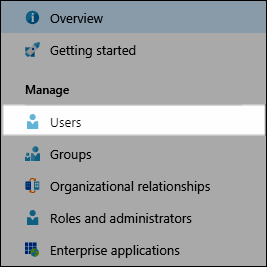
- Navigate to the Azure Portal and the Azure Active Directory section.
- From the list of items click Users.
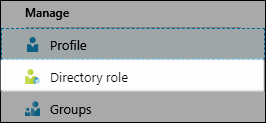
- Find your name/login in the list and select it.
- In the menu that appears click Directory role.
- You want to be a Global Administrator.